
Tutorial: How To Add Emojis To Content Or A Web Design Using HTML
Add emoticons, weather symbols, sports symbols, or even watermelons!
Emojis can give content a light-hearted fun feel and a splash of colour! This tutorial shows you an easy way to add emojis to your content or web design using a tiny bit of HTML. Bookmark this guide or add it to your SOPs for any time you need it.
How to get the HTML code for an emoji and display it:
- Use the search function on symbl.cc to find an emoji you like.
- Then use unicode.org if you need to see how a particular emoji looks on different platforms.
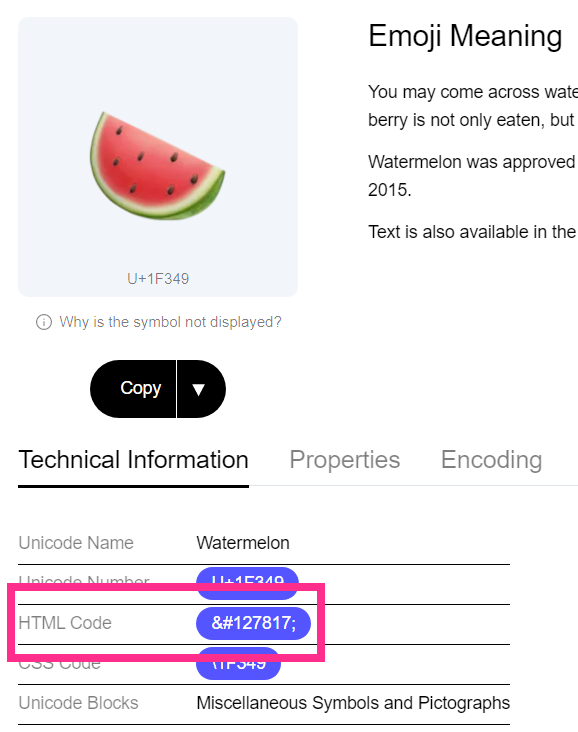
- Once you’re happy with the emoji you’ve found, click the ‘HTML Code’ element on the symbl.cc website to copy it (see screenshot below).
- Finally, paste the HTML code where you want it in your content.
Depending on the CMS you use, you may need some low-level skills to get the HTML code to work. Most will display straight away though. For example in a WordPress paragraph block the emoji should immediately show when you paste the HTML code.
If it doesn’t show while editing content it may still render on the front-end.
Refer to the guides or documentation available for your CMS if you’re having trouble getting the emojis to show using HTML.
Common problems with using HTML code for rmojis
This method of display emojis isn’t perfect, here’s the two biggest downsides that I’m aware of to using HTML emojis:
- Accessibility: Emojis are not accessible to all users, especially those who use assistive technologies such as screen readers. For example, screen readers may not be able to interpret the meaning of an emoji or may read out the emoji code instead of the intended symbol.
- Limited Compatibility: While most modern browsers support emojis, some older browsers will not render them properly or don’t support them at all. This can result in the emojis appearing as blank squares or as other symbols, which is not great for user experience!
How to fix the above issues:
- Download the SVG or PNG by clicking the small dropdown arrow next to ‘Copy’ (on symbl.cc).
- Upload it to your server and use img src instead and add a descriptive alt tag.
The downside to fixing the issues like this is it’s more complicated and takes longer.
On the positive side of things, using HTML means the emojis will render differently on different platforms. This means familiarity for users.
How I added emoji’s into the satch.co.uk web design
I didn’t plan to include emoji’s in the main content, instead I wanted them to show above the title. Here’s how I did it:
- Created a WordPress custom field for posts and pages using the name ’emoji_above_title’. In the custom field instructions I’ve added a link to symbl.cc so I can easily click it and quickly start finding an emoji I want.
- Once I find an emoji I like, I simply paste in the HTML code into the custom field on the relevant post/page.
- In my template it performs a PHP if statement to check if the ’emoji_above_title’ custom field has content for the current post/page ID.
- If there is an emoji in the metadata for that post/page then it will output the value of the field to display it to users.
- To set the size of the emoji, the element has a class named ’emoji-above-title’ and in my CSS I have a font-size property declared for the class. The font-size property changes the emoji to the size I want it. See the CSS below.
Here’s the CSS where I set the size of the emoji:
.emoji-above-title {
    font-size: 2rem;
}
And that’s it. It’s a nice simple solution without needing to install any extra plugins or needing a chunk of code.